
Showing posts with label cooking. Show all posts
Showing posts with label cooking. Show all posts
Thursday, January 26, 2012
Tip: Label Leftovers
Label your leftovers and always store them in the same place in the refrigerator. Everyone will know where to find them and what they are. No excuses for not eating leftovers!

Monday, January 23, 2012
Tip: Tomato Paste Leftovers
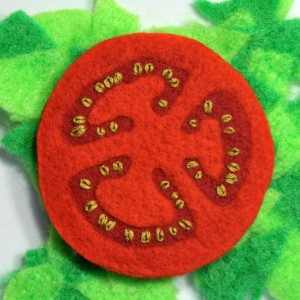 |
| Felt Tomato Slice Tutorial |
Freeze the leftovers in little baggies. Put a heaping tablespoon of paste in each baggie and freeze (after labeling and dating) until you need it.
Thursday, January 19, 2012
Tip: Bread Machine
Using a bread machine is much cheaper than buying bread at the grocery store and makes the whole house smell yummy. While making bread can be very daunting, the bread machine does the work for you and usually creates a great loaf of bread.
Wednesday, January 11, 2012
Tip: Homemade Microwave Popcorn
 |
| image source: wikipedia |
You can make your own microwave popcorn using a bag of regular popcorn ($1.80 at Walmart), a paper bag (which you use countless times to make popcorn), and whatever seasonings float your boat.
It's as simple as tossing 1/4 cup popcorn into the bag, folding the top down twice, and microwaving it just the same as the bags of microwave popcorn.
If you choose you can add a little oil or butter to the popping and then experiment with toppings (salt, garlic, parmesan cheese, chili powder, cinnamon(?), etc) until you find your perfect mix. Seasoning the popcorn yourself allows you to cut down on oil and salt, and to cut out any other funky stuff that might be in the prepackaged bags.
Tuesday, December 20, 2011
Beans, beans ...

Dave Ramsey talks about rice and beans as a frugal staple. "Rice and beans, and beans and rice" comes up quite a bit on the message boards his followers post on and on his facebook page. After reading it enough I knew it was something I needed to add to our diet, as our grocery budget is really tight and often strained to the point of breaking, and I was out of other ideas for saving in that area.
Pinto beans cost about $1 per pound, raw, at Sam's Club or WalMart. 1 lb of raw beans is about 2 cups of beans, and will equal about 6 cups of cooked beans. 6 cups of beans for $1. 6 cups of fiber, protein, and iron for $1. And they're filling. Seriously, hard to beat and much less expensive than the same amount of poultry or meat.
Rice we can eat, except that until just a few weeks ago I was a really, really crappy rice cooker. I've improved so much just by (1) rinsing the rice a lot and (2) following better cooking directions, actually cooking the rice for a shorter time than I thought I should.
Beans were a tougher sell around here. I tried bean soups, beans in casseroles, rice and beans, beans and rice. Not much luck, and I was serving them at least once a week. Darn it.
Over the last six months or so, however, the kids have gradually accepted beans as a part of their diets and meals. I've been able to sneak black beans or pinto beans into crock pot meals or casseroles and no longer receive complaints.
One day I needed refried beans. Not having a can of them available I found a recipe and made my own. The kids LIKE them. Really LIKE them. A LOT.
I use about 1 lb. of beans and end up with 9 cups of refried beans. Very cost effective.
Vegetarian Refried Beans
from allrecipes.com
1 lb. dry pinto beans, rinsed
2 T minced garlic, divided
1 medium tomato, diced, or 1 can diced tomato
2 T ground cumin
1 T chili powder
2 T olive oil
salt to taste
Place beans in a large saucepan and cover with an inch of water. Place over high heat and bring to a boil. When the beans have reached a boil remove from the stove, and drain. Return to the same pot and cover the beans with about 2" of water, and stir in 1 T garlic, the tomato, cumin, and chili powder. Bring to a boil over high heat, reduce heat to low and simmer for about 4 hours, until beans are very soft.
Once the beans have cooked remove some of the cooking water if there's quite a bit left, or add a little more if there isn't much left at all. Then add in the oil, salt, and remaining garlic. Mash or puree in food processor or blender. Place over low heat for 30 minutes, stirring occasionally.
Serve.
* I have heard that beans are more digestible if an acid, like lemon juice, is added when the beans are first boiled.
* I have also heard that soaking the beans overnight, rather than bringing them to the first boil, is better for digestion. When I can't soak them overnight I bring them to a boil, turn the heat off, and let them sit for a few hours before draining them.
("more digestible", "better for digestion" = polite way to say "less tooting")
I freeze the refried beans we can't use right away, usually 2 3-cup containers. When storing food I use these ZipLoc containers. They're clear and easy to label on the tops with tape, and they stack very well. In the refrigerator leftovers are kept in the ZipLoc containers, always stacked on the same shelf on the same side, making it really easy for the kids and I to know what needs to be eaten first, limiting waste. In the freezer they get labeled and dated and stacked ... easy to grab what I need.
The recipe we make most often with the beans is the Southwest Roll-ups. If you follow my menu plan Mondays you've probably noticed we make this once a week or so. The kids love them, and love having extras in the freezer that they can quickly pop into the oven even more. This past Sunday night I made 30 roll-ups, using 6" tortillas, for 7 people and there wasn't a single one left after the meal. They're that good.
Do you have a family "go to" bean recipe? A frugal favorite to share? Leave a link or recipe in the comments.
Friday, December 16, 2011

Monday, December 12, 2011
33 Uses for Leftover Candy Canes
 |
| Image courtesy of Candyblog |
#21 has been added to my Christmas baking list.
Do you have any other ideas for leftover Christmas treats?
Saturday, December 10, 2011
Tip: Salad Dressing
Making your own salad dressing is an easy cost saver. Homemade dressing is preservative free, seasoned to your liking, fresh, cost effective, and as easy as hitting the pulse button on the blender.
Here is the recipe for a favorite salad dressing of mine. When this is served on our dinner table the salad is gone!
*My dispensers are clear with an easy to use lid and were very inexpensive at the dollar store. I use them for honey, soy sauce, and syrup which I buy in bulk, making the containers much too large for the kids. I also use them for salad dressing.
More dressing recipes can be found at:
Here is the recipe for a favorite salad dressing of mine. When this is served on our dinner table the salad is gone!
Oriental Dressing
6 tsp. rice vinegar
2 tbsp. lemon juice
1 tsp. white pepper
1 1/2 tsp. dried mustard
1/2 c. oil
1 tbsp. sesame oil
4 tbsp. sugar
1 1/2 tsp. salt
I toss all the ingredients into a ketchup type dispenser like the one in this picture* and shake.
2 tbsp. lemon juice
1 tsp. white pepper
1 1/2 tsp. dried mustard
1/2 c. oil
1 tbsp. sesame oil
4 tbsp. sugar
1 1/2 tsp. salt
I toss all the ingredients into a ketchup type dispenser like the one in this picture* and shake.
*My dispensers are clear with an easy to use lid and were very inexpensive at the dollar store. I use them for honey, soy sauce, and syrup which I buy in bulk, making the containers much too large for the kids. I also use them for salad dressing.
More dressing recipes can be found at:
- recipezaar.com
- Make Your Own Salad Dressings
- Muriel Hemingway's Amazing Spinach Dressing (this is really, really, really good and easy - everything gets tossed into the blender, I see this recipe uses olives - I've never heard that before and haven't ever tried it that way)
Wednesday, November 30, 2011
How To Cook Brown Rice
It might be a stretch to call this a frugal tip, but for the first time I've made good brown rice and this is the recipe/tutorial I used. He says it works with white rice too, I"ll be trying that as I don't make good white rice either.
I'm so happy to have finally made good rice (and the kids were too, "maybe this time it will turn out better" was uttered before the meal")!
*I haven't yet checked out the rest of the site associated with the brown rice cooking instructions, but it looks really interesting and worth a peek.
I'm so happy to have finally made good rice (and the kids were too, "maybe this time it will turn out better" was uttered before the meal")!
*I haven't yet checked out the rest of the site associated with the brown rice cooking instructions, but it looks really interesting and worth a peek.
Monday, November 28, 2011
Menu Plan Monday 11/28/11
Each Monday I shall post our dinner menu plan for the current week.
The kids feed themselves for breakfast and lunch (usually lots of fruit, pasta, sandwiches, or leftovers) so I will only be posting the dinner menu, as that's what I cook.
Please link to your weekly menu in the comments if you are inclined. I'm always looking for new ideas.
Sunday - the kids weren't home yet, so I didn't cook, leftovers instead
Monday - Country Frittatta with zucchini and bell pepper, celery sticks with ranch dressing
Tuesday - Spaghetti with tomato sauce, tangerines
Wednesday - Slow Cooker BBQ Chicken (just chicken covered with BBQ sauce in crock pot), brown rice
Thursday - Turkey Burgers on rolls with toppings, broccoli
Friday - Chicken on the grill, grilled veggies
Saturday - Chicken and Black Bean Enchilada Casserole
The kids feed themselves for breakfast and lunch (usually lots of fruit, pasta, sandwiches, or leftovers) so I will only be posting the dinner menu, as that's what I cook.
Please link to your weekly menu in the comments if you are inclined. I'm always looking for new ideas.
Sunday - the kids weren't home yet, so I didn't cook, leftovers instead
Monday - Country Frittatta with zucchini and bell pepper, celery sticks with ranch dressing
Tuesday - Spaghetti with tomato sauce, tangerines
Wednesday - Slow Cooker BBQ Chicken (just chicken covered with BBQ sauce in crock pot), brown rice
Thursday - Turkey Burgers on rolls with toppings, broccoli
Friday - Chicken on the grill, grilled veggies
Saturday - Chicken and Black Bean Enchilada Casserole
Friday, November 25, 2011
Tip: Grow Herbs Instead of Buying Cut

Today's tip ... the grocery store sells bunches of fresh herbs for $.99 and up. They're delicious.
The garden center sells fresh herb plants for $1.99 and up. The garden herbs may cost a little more but they will continue to produce fresh herbs as long as they are alive (keeping things alive isn't so easy around here). And they'll keep the area they're growing in smelling and looking wonderful.
To save even more, consider growing your herbs from seed. They don't take long to sprout and begin growing.
Wednesday, November 23, 2011
Tip: Bringing Lunch to Work
Looking for a simple way to save $260? $1040?
How? As easy as bringing your lunch to work.
Bringing lunch to work one day a week saves about $260 a year ... that's enough for a family of 3 to go to Busch Gardens.
Bringing lunch to work four days a week saves about $1040 a year ... that's enough for one very nice family vacation.
How? As easy as bringing your lunch to work.
Bringing lunch to work one day a week saves about $260 a year ... that's enough for a family of 3 to go to Busch Gardens.
Bringing lunch to work four days a week saves about $1040 a year ... that's enough for one very nice family vacation.
Monday, November 21, 2011
Tip: FridgeKeepers
Fresh produce is a wonderful thing.
Fresh produce is also, however, not inexpensive. And it doesn't last as long as most of us need it to.
 That's where the Tupperware FridgeSmart containers come in. They extend the life of my produce significantly, at least double what it would be without the containers. The produce stays fresh, crispy, tasty, and healthy in appearance for much longer.
I buy romaine at Sam's Club and can cut it up and put it in one of these containers. It stays fresh and crispy without browning, and it's quick and easy for all of us to grab a bowl of salad as it's already prepared.
After using these for a few years I can't imagine not using them, and wouldn't want to.
I'm going to be the first to admit that these Tupperware FridgeSmart containers are pricey. It is possible that there is a less expensive alternative to them, and I'd love to hear from you if you've found one.
***I don't work for Tupperware nor do I represent them in any way. I just like this product. If you're going to purchase the containers ask around and find a friend or associate who sells the product so they can receive the commission on the sale. If you sell Tupperware, or a line with a similar product, feel free to leave a comment saying so.
Fresh produce is also, however, not inexpensive. And it doesn't last as long as most of us need it to.
 That's where the Tupperware FridgeSmart containers come in. They extend the life of my produce significantly, at least double what it would be without the containers. The produce stays fresh, crispy, tasty, and healthy in appearance for much longer.
I buy romaine at Sam's Club and can cut it up and put it in one of these containers. It stays fresh and crispy without browning, and it's quick and easy for all of us to grab a bowl of salad as it's already prepared.
After using these for a few years I can't imagine not using them, and wouldn't want to.
I'm going to be the first to admit that these Tupperware FridgeSmart containers are pricey. It is possible that there is a less expensive alternative to them, and I'd love to hear from you if you've found one.
***I don't work for Tupperware nor do I represent them in any way. I just like this product. If you're going to purchase the containers ask around and find a friend or associate who sells the product so they can receive the commission on the sale. If you sell Tupperware, or a line with a similar product, feel free to leave a comment saying so.
Thursday, November 17, 2011
Tip: Bring a Lunch

It's easy to stop at a fast food restaurant for a quick bite, or to eat at an attractions restaurant, but that can cost $30 or so and, especially with fast food, won't be the healthiest choice.
Busch Gardens, and many other parks and attractions, will allow you to bring a cooler into the park. Lockers are available to rent if needed.
Instead, spend a few minutes making sandwiches and slicing veggies and you're good to go.
Worried that your cooler will get warm before lunch? Freeze your water bottles the day before and they'll serve double duty - as ice packs and refreshment.
Tuesday, November 15, 2011
Tip: Using a Slow Cooker
A crock pot or slow cooker cooks food by simmering it for hours at a relatively low temperature, allowing for unattended cooking of a gazillion things (or so it seems).
In the crock pot you can cook:
365 Days of Slow Cooking
A Year of Slow Cooking (easy to search and each recipe includes her review of the results)
Any favorite slow cooker recipes or links to share?
In the crock pot you can cook:
- yogurt
- bbq chicken (chicken breast, bbq sauce ... couldn't be any easier!)
- slow cooker thai peanut chicken (a favorite in this house)
- soap
- chicken all dressed up
- chili
- soup
- alcoholic drinks
- and more
365 Days of Slow Cooking
A Year of Slow Cooking (easy to search and each recipe includes her review of the results)
Any favorite slow cooker recipes or links to share?
Monday, November 14, 2011
Tip: Write a Weekly Menu
 Have you noticed that I post my weekly menu plan here at Because I'm Frugal?
Creating a weekly meal plan was an idea I resisted for a long time. I just didn't think that the time it'd take to do it would be worth the results.
One day, however, I broke down and just did it. I got out all the old recipes I hadn't made in ages and, looking at them, got really excited about all the great meals we'd been missing. I also asked friends for their tried and true healthy, inexpensive recipes and was overwhelmed by the response ... and by the number of them who write a weekly menu (and hadn't told me!).
Each Sunday or Monday I sit down and plan the menu for the week, based on what's on sale, what I have on hand, and what I purchased at the farmer's market over the weekend.
I keep a binder on the counter with printed recipes in it. It also contains calendar pages of what we've eaten the weeks before so I can repeat the good stuff, NOT repeat the bad stuff, and avoid repeating things too often.
I now spend about 10 or 15 minutes planning our meals for a week.
A few of the benefits:
- When you have no idea what you're making for dinner and it's 5:45 getting pizza or grabbing a bite somewhere is so easy. With a menu plan a meal is already in the crock pot, or at least planned, taking the "deer in headlights" feeling out of dinner preparation.
- It's a time saver. No spending time searching for recipes and ingredients to use what you have. You've already done that ahead of time.
- Helps save at the grocery store. Knowing what you'll cook makes it easier to not give in to the temptation of those impulse extras. Also, it allows you to purchase what you'll actually use in quantities you'll actually use.
- Having a weekly plan makes it easy to provide a healthy and nutritional balance throughout the week.
- Trying new things is fairly simple with a meal plan.
- Fewer trips to the grocery store. It's easy to add something to the weekly grocery list, much easier than running out at the last minute for some odd lone ingredient like Smoked Paprika (which tends to lead to impulse purchases as well).
- Having shredded chicken one night and diced chicken another? Cook them at the same time and set one aside. The work for the second meal is done with no extra effort.
- There's much less waste. The perishable fruits, vegetables, and meats are used before they might go bad, because the menu is planned around their existence and life span.
- Family time. Knowing what the kids activities are ahead of time enables planning a meal that works with their hectic schedules, while still allowing time to eat as a family . Also, there's something about a meal or dinner menu plan that says "sit down and eat this meal as a family".
Monday, November 7, 2011
Menu Plan Monday 11/7/11
Each Monday I shall post our dinner menu plan for the current week.
The kids feed themselves for breakfast and lunch (usually lots of fruit, pasta, sandwiches, or leftovers) so I will only be posting the dinner menu, as that's what I cook.
Please link to your weekly menu in the comments if you are inclined. I'm always looking for new ideas.
Sunday - pizza night, salad
Monday - leftovers (kids will be gone for the night)
Tuesday - Crock pot BBQ chicken (chicken, bbq sauce), rice, salad
Wednesday - Country Frittata*, apple slices, salad
Thursday - Macaroni and Cheese, pumpkin muffins,
Friday - Chicken on the Grill, peppers and zucchini on the grill, salad
Saturday - leftover pizza
Country Frittata, from the recipe paper on top of the Philadelphia Cooking Creme container
1 tub Philadelphia Cooking Creme Original, divided (link to coupon below)
6 eggs
1/4 t black pepper
2 T butter
1 C chopped green pepper
4 green onions sliced or 1/8 cup chopped onion
1/4 C chopped smoked ham or chopped cooked turkey bacon or cooked diced chicken
1/2 C shredded cheddar cheese
Set aside 1/4 C cooking creme.
Whisk remaining cooking creme with eggs until well blended.
Melt butter in ovenproof skillet on medium heat. Add peppers: cook and stir about 5 min, until crisp-tender. Stir in egg mixture, onions, and meat; cover. Cook on medium low 8-9 minutes, until center is almost set.
Heat broiler. Uncover frittata; sprinkle wiht cheddar. Broil, 6" from heat, 2-3 minutes or until center is set and cheese is melted. Drizzle with reserved cooking creme.
***This is a good clean-out-the-fridge recipe. You can add in cooked pasta, cooked veggies, almost any meat, and almost any cheese. Be creative.

$1 off 1 package of Philadelphia Cooking Creme
We love this stuff. The frittata is always a hit at our house. I've also used it pretty much anywhere that calls for cooked cheese - quesadillas, pastas with alfredo sauce, etc. - and the kids even like it on bagels because it's smoother than regular cream cheese.
The kids feed themselves for breakfast and lunch (usually lots of fruit, pasta, sandwiches, or leftovers) so I will only be posting the dinner menu, as that's what I cook.
Please link to your weekly menu in the comments if you are inclined. I'm always looking for new ideas.
Sunday - pizza night, salad
Monday - leftovers (kids will be gone for the night)
Tuesday - Crock pot BBQ chicken (chicken, bbq sauce), rice, salad
Wednesday - Country Frittata*, apple slices, salad
Thursday - Macaroni and Cheese, pumpkin muffins,
Friday - Chicken on the Grill, peppers and zucchini on the grill, salad
Saturday - leftover pizza
Country Frittata, from the recipe paper on top of the Philadelphia Cooking Creme container
1 tub Philadelphia Cooking Creme Original, divided (link to coupon below)
6 eggs
1/4 t black pepper
2 T butter
1 C chopped green pepper
4 green onions sliced or 1/8 cup chopped onion
1/4 C chopped smoked ham or chopped cooked turkey bacon or cooked diced chicken
1/2 C shredded cheddar cheese
Set aside 1/4 C cooking creme.
Whisk remaining cooking creme with eggs until well blended.
Melt butter in ovenproof skillet on medium heat. Add peppers: cook and stir about 5 min, until crisp-tender. Stir in egg mixture, onions, and meat; cover. Cook on medium low 8-9 minutes, until center is almost set.
Heat broiler. Uncover frittata; sprinkle wiht cheddar. Broil, 6" from heat, 2-3 minutes or until center is set and cheese is melted. Drizzle with reserved cooking creme.
***This is a good clean-out-the-fridge recipe. You can add in cooked pasta, cooked veggies, almost any meat, and almost any cheese. Be creative.

$1 off 1 package of Philadelphia Cooking Creme
We love this stuff. The frittata is always a hit at our house. I've also used it pretty much anywhere that calls for cooked cheese - quesadillas, pastas with alfredo sauce, etc. - and the kids even like it on bagels because it's smoother than regular cream cheese.
Thursday, November 3, 2011
Pumpkin Cooking
This year we didn't get pumpkins for Halloween. It just didn't happen, and the kids were ok with it.
The day after Halloween, however, I drove past a deserted pumpkin patch with a couple hundred orphaned pumpkins ready for the dumpster. I was lucky enough to snag a few still in great condition. And one tiny one for my youngest (who wasn't too cutely enamored with his baby pumpkin .. he wanted to cut it open immediately). All for free.
But does one do with pumpkins after Halloween?
Today I scooped out the insides, saving the seeds, and got to cooking them so I could puree the meat and freeze it.
I'd read online that the microwave was the way to go. I cooked half of the first pumpkin for 15 minutes and it came out as uncooked and tough as it was when it went in. I then put a cup full of water in the microwave with the pumpkin to steam it and keep it moist and cooked it some more. That seemed to help a bit. I kept going cooking the pumpkins in batches. Two pumpkins took forever, probably a good two hours, and still weren't soft. I eventually managed to cook them enough to cut off the outer skin.
I then turned on the oven, put the pumpkin pieces on a sheet pan, and baked for about 40 minutes. I did this in batches and it worked very well.
After I decided the pumpkin was finally soft enough (the oven worked so much better) the pieces went into a huge mixing bowl so I could beat them with a mixer, which sent pumpkin bits all over the kitchen. But it got the pumpkin mixed enough to put in the food processor, which finished the pureeing.
The pumpkin was then moved into ziploc containers and labeled, then set in the freezer after cooking.
Two too-large pumpkins yielded 24 cups of pureed meat.
The last pumpkin was cut open and only used for seeds. I'd had enough pumpkin cooking for one day.
Next time the pumpkins will be cut in half, cleaned out, and cooked in the oven, probably with a little water in the pan or inside the pumpkin. And I will look for slightly smaller pumpkins.
The good, from Self Nutrition Data: This food is low in Saturated Fat, and very low in Cholesterol and Sodium. It is also a good source of Vitamin E (Alpha Tocopherol), Thiamin, Niacin, Vitamin B6, Folate, Iron, Magnesium and Phosphorus, and a very good source of Dietary Fiber, Vitamin A, Vitamin C, Riboflavin, Potassium, Copper and Manganese.
If you've ever tasted pumpkin from (pumpkin, not pumpkin pie filling) you may have found that it isn't very good on it's own. Fresh, cooked pumpkin is so much better.
Pumpkin can be used in muffins, pancakes, breads, pies, as baby food, desserts, pumpkin butter, and a whole lot more and they should be available in stores for another month or so if you wish to cook your own.
The day after Halloween, however, I drove past a deserted pumpkin patch with a couple hundred orphaned pumpkins ready for the dumpster. I was lucky enough to snag a few still in great condition. And one tiny one for my youngest (who wasn't too cutely enamored with his baby pumpkin .. he wanted to cut it open immediately). All for free.
But does one do with pumpkins after Halloween?
Today I scooped out the insides, saving the seeds, and got to cooking them so I could puree the meat and freeze it.
I'd read online that the microwave was the way to go. I cooked half of the first pumpkin for 15 minutes and it came out as uncooked and tough as it was when it went in. I then put a cup full of water in the microwave with the pumpkin to steam it and keep it moist and cooked it some more. That seemed to help a bit. I kept going cooking the pumpkins in batches. Two pumpkins took forever, probably a good two hours, and still weren't soft. I eventually managed to cook them enough to cut off the outer skin.
I then turned on the oven, put the pumpkin pieces on a sheet pan, and baked for about 40 minutes. I did this in batches and it worked very well.
After I decided the pumpkin was finally soft enough (the oven worked so much better) the pieces went into a huge mixing bowl so I could beat them with a mixer, which sent pumpkin bits all over the kitchen. But it got the pumpkin mixed enough to put in the food processor, which finished the pureeing.
The pumpkin was then moved into ziploc containers and labeled, then set in the freezer after cooking.
Two too-large pumpkins yielded 24 cups of pureed meat.
The last pumpkin was cut open and only used for seeds. I'd had enough pumpkin cooking for one day.
Next time the pumpkins will be cut in half, cleaned out, and cooked in the oven, probably with a little water in the pan or inside the pumpkin. And I will look for slightly smaller pumpkins.
The good, from Self Nutrition Data: This food is low in Saturated Fat, and very low in Cholesterol and Sodium. It is also a good source of Vitamin E (Alpha Tocopherol), Thiamin, Niacin, Vitamin B6, Folate, Iron, Magnesium and Phosphorus, and a very good source of Dietary Fiber, Vitamin A, Vitamin C, Riboflavin, Potassium, Copper and Manganese.
If you've ever tasted pumpkin from (pumpkin, not pumpkin pie filling) you may have found that it isn't very good on it's own. Fresh, cooked pumpkin is so much better.
Pumpkin can be used in muffins, pancakes, breads, pies, as baby food, desserts, pumpkin butter, and a whole lot more and they should be available in stores for another month or so if you wish to cook your own.
Monday, October 24, 2011
Menu Plan Monday 10/24/11
Each Monday I shall post our dinner menu plan for the current week.
The kids feed themselves for breakfast and lunch (usually lots of fruit, pasta, sandwiches, or leftovers) so I will only be posting the dinner menu, as that's what I cook.
Please link to your weekly menu in the comments if you are inclined. I'm always looking for new ideas.
Sunday - Lazy Crock Pot Chicken with Mushrooms , salad, steamed carrots
Monday - Southwest Roll-ups using homemade refried beans, corn, salad
Tuesday - Chicken Bake, salad, sauteed yellow squash
Wednesday - Chicken Tacos, salad, refried beans
Thursday - Imitation Chick-Fil-A nuggets (haven't found a recipe yet, please share a winner!), salad
Friday - Grilled Chicken, potato salad, salad
Saturday - Leftovers or spaghetti and tomato sauce
The kids feed themselves for breakfast and lunch (usually lots of fruit, pasta, sandwiches, or leftovers) so I will only be posting the dinner menu, as that's what I cook.
Please link to your weekly menu in the comments if you are inclined. I'm always looking for new ideas.
Sunday - Lazy Crock Pot Chicken with Mushrooms , salad, steamed carrots
Monday - Southwest Roll-ups using homemade refried beans, corn, salad
Tuesday - Chicken Bake, salad, sauteed yellow squash
Wednesday - Chicken Tacos, salad, refried beans
Thursday - Imitation Chick-Fil-A nuggets (haven't found a recipe yet, please share a winner!), salad
Friday - Grilled Chicken, potato salad, salad
Saturday - Leftovers or spaghetti and tomato sauce
Tuesday, October 18, 2011
Tip: Homemade Yogurt
This is not a new concept, or my own concept. But it's one I love and have been faithful to for years, and a recipe I swear by.
Originally, I found the recipe here. Another great easy-to-follow rendition is here. After giving you those links I know I don't have much else to say on the subject but I'll give you my "plan of attack" anyway.
In the crock pot goes 8 cups of milk. I use whole milk because that's what I buy. You can use 1% or 2%. Turn the crockpot on low and let it sit for 2.5 hours.
After 2.5 hours turn the crock pot off, unplug, and let it sit for 3 hours. Now, you can let it sit longer if you want (or if you forget about it ... not that I've EVER done that. much.) but it leads to more sour yogurt if it sits too long. Just know that you don't have to be rigid with any of the times, but they do seem to produce the best results.
After 3 hours add 1/2-1 cup yogurt (I use one single serving container). You can use plain or flavored, regular or greek or one of the "plus" kinds ... the greek and plus ones seem to produce slightly thicker yogurt and the other cultures in them also seem to grow (I don't know this for a fact, but I choose to believe it), so I go with these. I add 1/2-1 cup sugar or honey at this time as well, stirring until it's dissolved. Sometimes, if I have it on hand, I add in a tbsp. or so of vanilla, but if I don't have any I don't sweat it.
Cover the crock pot with a thick towel or blanket and let it sit for 8-12 hours.
Eat.
The yogurt will generally be slightly runnier than regular yogurt. That's fine. For babies I freeze little bits in ice cube trays and give them that to work on - great for teething and lets them eat it themselves.
I store it in the fridge in ziploc containers (containers, not bags). If I have fruit on hand I'll add it in before storing so the kids can just grab and eat. You could also freeze the yogurt, in this house I'm lucky to not run out even when making batches back to back.
Or I make smoothies with yogurt, ice, raw spinach, and fruit ... and whatever else we have on hand. The spinach will make the smoothie green but it won't make it taste like spinach so it's a good way to up that iron and green leaf intake. I freeze little bits of that for the babies too.
It didn't take long at all for my kids to decide that they liked Mama's yogurt better than store bought.
1/2 gallon of milk is about $1.50, 1 cup yogurt is about $.50 (not that I'd ever actually pay full price for it, but if I did it'd cost that) ... total cost for 9 cups of yogurt = $2 ... about $.22 a cup. Single serve yogurts at the grocery store are less than 1 cup, so this ends up being a really good price, it doesn't beat a super Publix BOGO deal topped with coupons (which is when I stock up on the starter containers of yogurt and freeze them for future use), but still, it's a really good price and you have more control over the final product.
Originally, I found the recipe here. Another great easy-to-follow rendition is here. After giving you those links I know I don't have much else to say on the subject but I'll give you my "plan of attack" anyway.
In the crock pot goes 8 cups of milk. I use whole milk because that's what I buy. You can use 1% or 2%. Turn the crockpot on low and let it sit for 2.5 hours.
After 2.5 hours turn the crock pot off, unplug, and let it sit for 3 hours. Now, you can let it sit longer if you want (or if you forget about it ... not that I've EVER done that. much.) but it leads to more sour yogurt if it sits too long. Just know that you don't have to be rigid with any of the times, but they do seem to produce the best results.
After 3 hours add 1/2-1 cup yogurt (I use one single serving container). You can use plain or flavored, regular or greek or one of the "plus" kinds ... the greek and plus ones seem to produce slightly thicker yogurt and the other cultures in them also seem to grow (I don't know this for a fact, but I choose to believe it), so I go with these. I add 1/2-1 cup sugar or honey at this time as well, stirring until it's dissolved. Sometimes, if I have it on hand, I add in a tbsp. or so of vanilla, but if I don't have any I don't sweat it.
Cover the crock pot with a thick towel or blanket and let it sit for 8-12 hours.
Eat.
The yogurt will generally be slightly runnier than regular yogurt. That's fine. For babies I freeze little bits in ice cube trays and give them that to work on - great for teething and lets them eat it themselves.
I store it in the fridge in ziploc containers (containers, not bags). If I have fruit on hand I'll add it in before storing so the kids can just grab and eat. You could also freeze the yogurt, in this house I'm lucky to not run out even when making batches back to back.
Or I make smoothies with yogurt, ice, raw spinach, and fruit ... and whatever else we have on hand. The spinach will make the smoothie green but it won't make it taste like spinach so it's a good way to up that iron and green leaf intake. I freeze little bits of that for the babies too.
It didn't take long at all for my kids to decide that they liked Mama's yogurt better than store bought.
1/2 gallon of milk is about $1.50, 1 cup yogurt is about $.50 (not that I'd ever actually pay full price for it, but if I did it'd cost that) ... total cost for 9 cups of yogurt = $2 ... about $.22 a cup. Single serve yogurts at the grocery store are less than 1 cup, so this ends up being a really good price, it doesn't beat a super Publix BOGO deal topped with coupons (which is when I stock up on the starter containers of yogurt and freeze them for future use), but still, it's a really good price and you have more control over the final product.
Subscribe to:
Posts (Atom)
